Welding copper pipe can be an effective way to connect pipes and systems together, but it requires proper tools and knowledge to ensure safety and precision. In this article, we will provide you with step-by-step instructions on how to safely and efficiently mend copper pipe.
(How To Weld Copper Pipe)
Step 1: Safety before working
First and foremost, always wear protective gear that is suitable for the type of work being done. Wearing appropriate equipment such as a safety glasses, goggles, and a hard hat is crucial in ensuring your safety during the process.
Once you have completed basic safety precautions, it’s time to get started. Ensure you have all necessary materials and equipment at hand before diving into the process. If you are unsure about what you need or where you can find them, consult your local hardware store or online retailers.
Step 2: Assemble the pipe
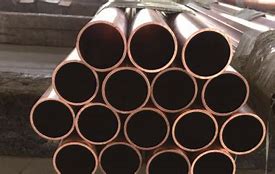
Once you have safety precautions in place, it’s time to start assembling the pipe. Begin by making sure that the joints between the two ends of the pipe are straight and in line. Use wire cutters to remove any nails or screws from the end of each leg of the pipe. Use clamps or tape to hold the pieces together securely.
If the pipe is not properly assembled, it may become loose or collapse over time. Make sure to use parentheses or other safety devices to secure the connections when they come loose. Once the pipe is fully assembled, let it rest for a few minutes to allow the new joints to set and join well.
Step 3: Sand and the pipe
Next, it’s time to sand and the pipe. Be careful not to apply too much pressure while sanding the pieces, as this could cause them to become rough and uneven. Sand gently and evenly, using a circular motion or an electric drill to create smooth surfaces. If the pipe is particularly smooth, you may need to apply more sandpaper or sandpaper grit to help smooth out the finish.
Once the pipe has been painted or stained, it’s time to finish the job. Apply a primer or paint to the outside of the pipe and then add a layer of or clear coat. This can help protect the material from damage over time and keep the pipe looking its best.
Step 4: the finished product
Finally, it’s important to test the finished product to make sure it meets your expectations. Check the water flow rate, size, and resistance to strain to ensure that the pipe functions correctly. If there are any issues, address them immediately to prevent further damage.
(How To Weld Copper Pipe)
In conclusion, welding copper pipe can be a rewarding task that requires patience, precision, and creativity. By following these steps carefully, you can safely and efficiently mend copper pipe and ensure that it works properly. Remember to always wear protective gear and take safety precautions throughout the process. Good luck!

