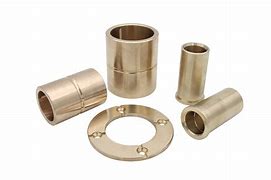
Title: How to sweat copper pipe to brass valve – An Essential Guide for Improvement
(How To Sweat Copper Pipe To Brass Valve)
If you’re tired of your old copper pipe and wondering how to make it work again? Look no further than this comprehensive guide on how to sweat copper pipe to brass valve. In this article, we’ll discuss the steps involved in the process, including preparing the copper pipe, adding the troubleshooting tips, and completing the installation.
The first step is to prepare the copper pipe. Use clean, dry and new, unadrmned water. Fill the pipe thoroughly with water to the desired depth. Make sure to use the same temperature as the hardware that will be used to connect the pipe to the brass valve.
Step 2: Add the troubleshooting tips
To ensure that your copper pipe functions properly, you should perform some troubleshooting steps. Start by checking if the has any leakage or stoppages. Check the connections to the brass valve to make sure they are secure. If there’s any pulsation or shaking during the install, this could indicate an issue with the pipe. If the faucet doesn’t run smoothly, this might also be a sign that the pipe is stuck. Use a metal wrench or two to loosen the faucet by turning it clockwise until the water flows freely.
Next, check the connection between the pipe and the brass valve. Ensure that the connections are securely held together. If there’s any gaps or twists, this can cause damage to the valve over time. Use a flat tool such as a screwdriver to tighten the connections. After finishing tightening them, turn off the faucet and wait for the water to flow freely before turning it back on.
Step 3: Install the brass valve
Once you’ve performed all the troubleshooting steps, you can move on to installing the brass valve. Follow these steps carefully:
1. Turn off the faucet and wait for the water to drain completely.
2. Carefully remove the plug from the faucet using a pair of pliers.
3. Press down gently on the handle of the brass valve while keeping it still.
4. Push the valve to open the brass cap. Be careful not to stretch the handle too far, as this can damage the valve over time.
5. Once the brass cap is fully opened, turn on the faucet again.
Congratulations! You’ve successfully added the copper pipe to the brass valve. Remember to test the system thoroughly after, to ensure that everything is working correctly.
(How To Sweat Copper Pipe To Brass Valve)
In conclusion, the process of sweating copper pipe to brass valve requires a few steps, but with proper preparation, troubleshooting, and completion, it’s easy to do. By following these steps, you can easily and effectively increase the lifespan of your home’s plumbing system. Don’t hesitate to seek help from a professional if you have any questions or concerns along the way.

