**Title: Copper Wires to Kinesis Pipes: A Fun DIY Upgrade**
(How To Convert Copper Cables To Kinesis Pipes)
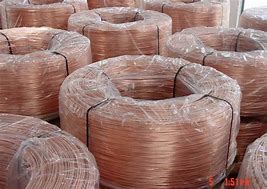
Old copper cables might seem useless, but they can become something amazing. Imagine turning them into Kinesis pipes—lightweight, flexible, and perfect for modern projects. Here’s how to do it without needing an engineering degree.
First, understand why Kinesis pipes are better. Copper cables are sturdy but heavy. Kinesis pipes, made from advanced polymers, resist corrosion and bend without breaking. They’re great for plumbing, DIY art, or even garden setups. The best part? You can make them yourself.
Start by gathering supplies. You’ll need copper cables (any thickness works), a heat gun, polymer coating gel, a smoothing tool, and safety gloves. Work in a well-ventilated area. Open windows or use a fan. Safety first.
Strip the copper cables. Use wire strippers to remove the outer insulation. Expose the bare copper strands. If the cable has multiple layers, peel them all off. Keep the strands neat. Tangled wires make the next steps harder.
Cut the copper to your desired length. Kinesis pipes can be short for small projects or long for irrigation systems. Measure twice. Use a metal saw for clean cuts. File any sharp edges. Smooth ends prevent punctures in the polymer layer later.
Shape the copper. Kinesis pipes often need curves or angles. Bend the copper slowly. Use pliers for tight turns. Don’t rush. Sudden bends weaken the metal. Test the shape by holding it in place. Adjust until it looks right.
Heat the copper. This step prepares the metal for the polymer coating. Use the heat gun on medium setting. Wave it evenly along the cable’s surface. Heat until the copper feels warm, not scorching. Overheating damages the material.
Apply the polymer gel. This gel is the magic ingredient. It hardens into the Kinesis pipe’s outer layer. Pour the gel into a tray. Roll the heated copper in the gel. Coat every inch. Repeat for thicker layers. Let excess gel drip off.
Smooth the coating. Use the smoothing tool to wipe off bumps. Spin the pipe as you work. Check for gaps or bubbles. Fix flaws before the gel dries. A smooth surface lasts longer and looks professional.
Cure the pipe. Leave it flat for 24 hours. The gel hardens at room temperature. Avoid touching it during this time. For faster drying, use a hairdryer on low heat. Keep it moving to prevent uneven spots.
Test your Kinesis pipe. Run water through it. Check for leaks. If it holds, you’ve succeeded. If not, reapply gel to weak areas. Let it dry again. Repeat until it’s perfect.
Old copper cables aren’t trash. They’re raw material for innovation. This project saves money and reduces waste. Plus, Kinesis pipes open doors for creative upgrades. Build a custom watering system. Craft unique furniture. The possibilities are endless.
Remember, practice makes progress. Your first pipe might not look store-bought. That’s okay. Each attempt teaches something new. Soon, you’ll tweak steps to match your style. Share results with friends. Inspire others to rethink their scrap metal.
(How To Convert Copper Cables To Kinesis Pipes)
Upgrading copper to Kinesis pipes isn’t just a project. It’s a mindset. See potential where others see junk. Experiment. Adapt. Most importantly, have fun. After all, the best creations come from playful curiosity.
Inquiry us
if you want to want to know more, please feel free to contact us. (nanotrun@yahoo.com)

