**Title: “Swapping Out Your Kitchen Faucet: A Battle With Ancient Copper Pipes?”**
(Is It Difficult To Replace A Kitchen Faucet When There Are Old Copper Pipes)
Your kitchen is the heart of your home. It’s where coffee brews, pancakes flip, and midnight snacks happen. But what if your trusty kitchen faucet starts dripping like a leaky roof? Maybe it’s time for an upgrade. The catch? Those old copper pipes lurking under the sink. Are they friend or foe in this DIY mission? Let’s dig in.
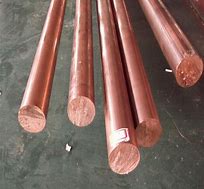
Replacing a faucet sounds straightforward. You unscrew the old one, pop in the new, and voilà—modern water flow. Reality check. Copper pipes, especially older ones, have personality. They’ve been around. They’re rigid, maybe a little corroded, and definitely set in their ways. Think of them as stubborn grandparents who hate change.
First, gather your tools. You’ll need a wrench, pliers, maybe a tubing cutter. Safety first—turn off the water supply. Look under the sink for shutoff valves. If your house is vintage, these valves might protest when touched. If they’re stuck, don’t force them. A snapped valve turns a simple project into a plumbing emergency.
Now, disconnect the old faucet. This is where copper pipes show their true colors. The nuts holding the supply lines might be fused to the pipes. Rust, mineral buildup, or decades of grime can glue them together. Spray some lubricant, wait a few minutes, then gently twist. If they still won’t budge, heat the joint with a hairdryer. Metal expands, breaking the bond. Just don’t set your sink on fire.
Once the old faucet is out, inspect the pipes. Copper is durable, but age can make it brittle. Check for greenish stains—a sign of corrosion. If the pipes look okay, you’re golden. If not, you might need to cut out damaged sections. A tubing cutter makes clean slices. Slide on new compression fittings, tighten them, and you’re back in business.
Installing the new faucet is the fun part. Follow the instructions. Most models fit standard setups. Slide the faucet into the sink hole, secure it from below. Connect the supply lines to the new faucet. Hand-tighten first, then give it a quarter-turn with a wrench. Don’t overdo it. Crushing the pipes is a one-way ticket to leaks.
Turn the water back on. Test for drips. If water sprays like a fountain, turn it off and check connections. Small leaks might just need a tighter twist. Bigger issues? Call a pro. No shame in backup.
Old copper pipes add steps, but they’re not dealbreakers. Patience is key. Soak stubborn nuts in vinegar overnight. Use a flashlight to see under the sink. Keep a towel handy for surprise drips. And remember—every DIY win starts with a deep breath.
(Is It Difficult To Replace A Kitchen Faucet When There Are Old Copper Pipes)
Upgrading a faucet with vintage plumbing is like solving a puzzle. It takes time, maybe a few curse words, but the result? A shiny new faucet that doesn’t drip-serenade you at 3 a.m. Plus, bragging rights. You faced the copper pipe era and won.
Inquiry us
if you want to want to know more, please feel free to contact us. (nanotrun@yahoo.com)

